After four months of sharing Christmas projects every Monday night, I am sad that this week is the final blog hop for us, for this year.
I'm going out with a bang - I have THREE cards to share with you. This will be a rather photo-heavy post, so you might want to make a cuppa! I have used the beautiful Shining Brightly Designer Series Paper, and colour scheme of Night of Navy, Very Vanilla and Gold, on all of my cards. The stamps and dies I've used are from the beautiful Christmas Classics bundle.
CARD #1:
The foliage square frame was cut from Night of Navy card, and the sentiment label from Very Vanilla card. I cut a piece of Distressed Gold Paper to mat the sentiment label.
This close-up shows the sentiment stamped in Night of Navy ink, on Very Vanilla card. I coloured some Iridescent Rhinestones with the Dark Night of Navy Stampin' Blends marker.
To the top right, and bottom left, of the sentiment label, I added a small foliage cluster, cut from Distressed Gold Paper. The open (mistletoe?) leaves were glued between the Very Vanilla and Distressed Gold squares. The large holly leaves were glued between the Distressed Gold square and the Night of Navy die-cut frame.
I cut a length of Night of Navy & Gold Glittered Ribbon in half lengthways, and made a bow. Glue dots were used to attach it to my card.
CARD #2:
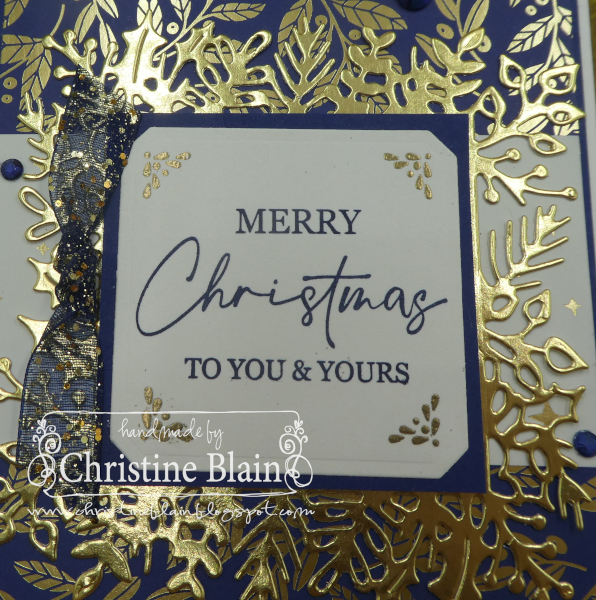
The foliage square frame was cut from Gold Foil Sheet, and the sentiment label from Very Vanilla card. I cut a piece of Night of Navy card to mat the sentiment label.
The sentiment (a mix of three stamps) was stamped in Night of Navy ink on Very Vanilla card. I stamped decorative "bits" in Versamark on each corner of the sentiment label, and heat-embossed them in gold. Unfortunately the fourth image (bottom left) embossed messily ... but I wasn't about to re-do it, after getting everything else lined up!
I laid a wide strip of Very Vanilla DSP behind the central focal piece, to contrast against the dark Night of Navy DSP background. A knotted piece of Night of Navy & Gold Glittered Ribbon was adhered to the left of the sentiment square.
Here's a closer look at the beautiful foiled pattern of the background paper, and the Iridescent Rhinestones that I coloured using the Dark Night of Navy Stampin' Blends Marker.
CARD #3:
The foliage square frame was cut from Very Vanilla card, and the sentiment label from Night of Navy card. I cut a piece of Gold Foil Sheet to mat the sentiment label.
I white heat-embossed the sentiment on the Night of Navy die-cut piece. A different strip of Designer Series Paper was laid across the leafy DSP, to sit behind the die-cut foliage frame.
A bow made from Gold Satin-Edged Ribbon was added to the left of the sentiment.
The gems I used on this card are Adhesive-Backed Sparkle Gems. Although they are champagne in colour, and a little warmer than the gold foiled accents on my card, I think they work nicely (and are quite subtle, despite their sparkle!).
I hope I have given you some inspiration to use the Christmas Classics bundle, and Shining Brightly Designer Series Papers, in a few different ways.
If you come across any broken links, or would like to see a comprehensive list of participants in our last blog hop for the year, head over to
Sharon Davern's blog. Sharon has done a fantastic job of co-ordinating our Christmas shares every Monday night for the past four months. We hope you have gained lots of ideas for using Stampin' Up! products in your Christmas crafting!
Listed below are all the products I used, when making my three cards. If you live in Australia, and would like to shop with me for your Stampin' Up! supplies, you can get to my online store by clicking on any of the thumbnail images below.
Product List


")


 Designer Series Paper")


 Sheer Ribbon")
.png)


")

 Specialty Paper")
 Designer Series Paper")


 Grosgrain Ribbon")


")


 Specialty Paper")
 Specialty Designer Series Paper")

 Glittered Ribbon")
 Satin Edged Ribbon")


